Stitching the parts together This is the final part of the construction process series. This is where all the parts are stitched together. The lower leather part with the upper parts. The vamp and the back leather part. For this task start by threading the needle. This needle is a different kind. They are called Osborne Braiding Needles at DICTUM ( https://www.dictum.com/en/sewing-tools-materials-bbc/osborne-braiding-needles-708419 ) and threading them is easier than using the saddle-maker's needles. They hold two "teeth" that I suppose they hold the thread in there. I am not sure if I did it right but for the whole project it did hold the thread pretty nicely without disengaging the thread at any time. I first passed the thread in the V shape lamina passing both teeth and then the short part of the thread again in the V shape lamina passing only the first tooth and that's it. This needle does not hold a sharp/pointy edge and is perf...
The Sole
The sole consists of two separate parts. The crepe sole which is attached to the lower leather part of the shoe and the rubber sole which will be glued underneath the crepe sole and which supposed to be interchangeable when worn out. The rubber sole comes to protect the stitches done between the crepe sole and the lower leather part of the shoe.
Ken Diamond here does more than one line of stitches. I chose not to do so. Ken does not use rubber sole at all in his version. I chose not to do so not only for the reason of the extra rubber sole but because stitches are done by hand and stitching the crepe sole with the lower leather part is quite difficult. It is the most difficult part of the whole project indeed. I suppose that Ken has the luxury of using sewing machines which I do not.
Use the blueprint of your foot outline. Sole is the one that will determine the whole look of the shoe. If you choose to follow it exactly then it will more likely look like the design done in the Craft Manual book and not like Ken's design.
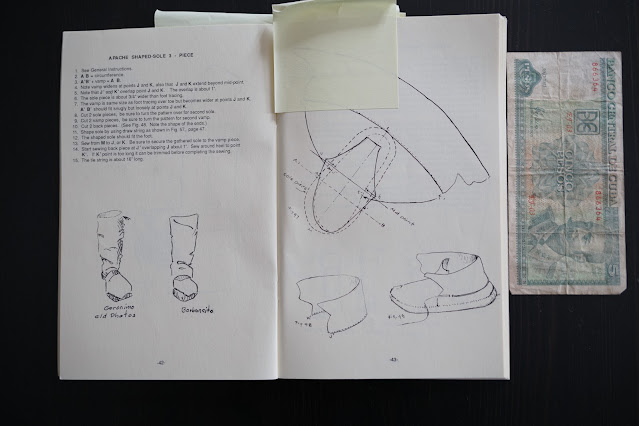
Here is the design I used taken straight from the book. It refers to as Apache moccasins. My design is a breed between the book's design and Ken's design. I have chosen to use my actual foot's outline blueprint though.
That cost me because I did not include the the arch of my foot in the blueprints. It cost me as the final shoe is too lose and wide. Please do consider that fact and try to include the arch in your design. I will do that in following ones.
When you are happy with the blueprint od the sole you can move on marking it on the crepe sole first.
I used a chalk as my marking means. A pen could do the job as well but it probably leave a permanent mark afterwards.
Use a pair of scissors to cut the crepe. Other tools wont be so precise and you need precision here. Fixing later on your cut will not be possible. Crepe is an unforgiving material except if you have other trimming, probably rotary tools and grinders. I am taking here the simplest of all methods using only basic tools.
Next step is to cut the rubber sole. It is far more easier than cutting the crepe. Here you can mark freely about 2cm or more outside the actual foot print (blueprint). You have to do so as applying later on the glue on your precious work on a precisely cut rubber sole would be almost impossible to fit from start. Thus leaving all this forgiving space saves you from ruining your work.
The rubber sole used here is of 1.8mm of thickness. Plus the 4mm thickness of the crepe sole it gives roughly a 6mm sole to walk on.
Again use a pair of scissors here to accomplish the job.
Following are some videos from first person shoot showing the above processes.


Comments
Post a Comment